Table of Contents
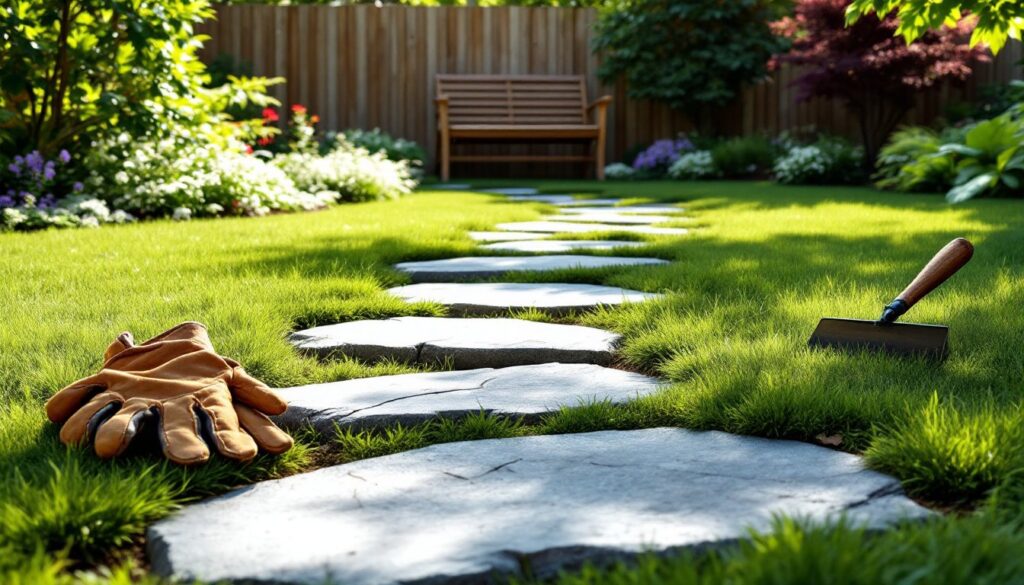
ToggleA stepping stone patio bridges the gap between a full-scale hardscape and a muddy backyard trail. It breaks up expanses of grass or gravel, adds texture and visual interest, and costs a fraction of a traditional poured or mortared patio. Whether homeowners are working with a tight budget, rental restrictions, or just want a weekend project that doesn’t require a concrete mixer, stepping stones deliver flexibility and charm. They’re forgiving to install, easy to adjust, and can be lifted and relocated if plans change.
Key Takeaways
- Stepping stone patio designs offer a budget-friendly, flexible alternative to traditional hardscape, requiring minimal site preparation and no special permits in most areas.
- Classic flagstone and modern geometric pavers each suit different aesthetics—irregular natural edges for soft landscapes versus crisp, contemporary lines for structured designs.
- Organic curved layouts using river rock and reclaimed materials create cottage-garden charm while maintaining affordability and allowing natural path adjustments.
- DIY concrete stepping stones can cost under $1 per stone, making this a weekend project accessible to renters and homeowners seeking quick, temporary solutions.
- Material selection should prioritize freeze-thaw durability, slip-resistant finishes (thermal or brushed), and 1.5- to 2-inch thickness to prevent cracking under foot traffic.
- Proper leveling with sand base and thoughtful spacing between stones—whether tight for a continuous surface or wide for groundcover—ensures safety, drainage, and long-term stability.
Why Choose a Stepping Stone Patio Design
Stepping stone patios require minimal site prep compared to mortared or concrete alternatives. No gravel base, no rebar, no waiting for curing. Dig shallow depressions, level with sand, drop the stones, and they’re ready to walk on.
This approach suits renters and homeowners alike. Stones lift out cleanly when it’s time to move or redesign. They also handle freeze-thaw cycles better than solid slabs because each piece can shift independently without cracking.
Drainage is another advantage. Water flows between stones instead of pooling on an impermeable surface. That reduces runoff, prevents ice buildup, and keeps moss and algae growth manageable with occasional brushing.
Permits typically aren’t required for non-mortared stepping stone installations since they’re considered landscaping rather than structural hardscape. Always check local codes if incorporating retaining walls or significant grading, but simple stone-on-sand layouts fall outside most permitting thresholds.
Classic Flagstone Stepping Stone Patios
Flagstone slabs, typically bluestone, sandstone, or limestone, offer irregular, natural edges that soften formal landscapes. Individual pieces range from 18 to 36 inches across and 1 to 2 inches thick, large enough to accommodate a full stride without wobbling.
Layout options include:
- Tight spacing (2–4 inches apart): Creates a nearly continuous surface. Fill joints with decomposed granite, pea gravel, or polymeric sand to lock stones in place and discourage weeds.
- Wide spacing (6–12 inches): Allows grass or low groundcover (creeping thyme, Irish moss) to grow between stones. Mow or trim edges to keep plants tidy.
Flagstone weighs 12 to 15 pounds per square foot at 1-inch thickness. Moving pieces requires a hand truck or a helper. Stones crack if dropped on hard surfaces, so stage them on grass or plywood during layout.
To level flagstone on uneven ground, excavate 3 to 4 inches deep, add 2 inches of coarse sand, and tamp with a hand tamper. Set stones flush with surrounding grade to prevent tripping and make mowing easier. Larger flagstones from quality landscaping stone suppliers remain stable without rocking underfoot.
Modern Geometric Stepping Stone Layouts
Square and rectangular concrete pavers, 12×12, 16×16, or 24×24 inches, create crisp, contemporary lines. Uniform sizing simplifies layout planning and ordering.
Geometric arrangements include:
- Grid pattern: Align pavers in straight rows with equal spacing. Use a measuring tape and stakes with string to mark rows before digging.
- Offset linear: Stagger pavers like a running bond brick wall. This adds movement while keeping edges parallel.
- Diagonal runs: Rotate pavers 45 degrees to the path direction. Extends visual length and breaks up predictable sightlines.
Concrete pavers cost $1 to $3 per square foot depending on thickness and finish (smooth, brushed, exposed aggregate). They’re more uniform in thickness than natural stone, making leveling faster.
For a polished look, use a 4-foot level to check that adjacent pavers sit at the same height. Add or remove sand underneath to adjust. Concrete pavers can be cut with a masonry blade on a circular saw or rented wet saw if partial pieces are needed at edges or curves.
Many modern outdoor design enthusiasts pair geometric pavers with linear plantings, grasses in narrow strips or boxwood hedges, to reinforce the structured aesthetic.
Natural and Organic Stepping Stone Arrangements
Curved paths and irregular spacing mimic trail systems found in wooded landscapes. This style works well in cottage gardens, shade gardens, or anywhere a formal grid feels out of place.
River rock stepping stones, smooth, rounded slabs 12 to 24 inches in diameter, nestle into mulch or gravel beds without rigid alignment. Lay them where feet naturally fall when walking at a relaxed pace. Test the path before final placement by walking it several times and adjusting stones that feel too far apart or awkwardly positioned.
Reclaimed materials add character:
- Broken concrete slabs: Salvaged from demolished driveways or sidewalks. Pieces with exposed aggregate or old stamped patterns bring texture. Edges are rough, so wear leather gloves when handling.
- Fieldstone: Collected from rural properties or purchased from landscape yards. Irregular thickness means more digging and shimming, but the varied colors and textures are unmatched.
Organic layouts benefit from mulch or wood chip fill between stones. It’s inexpensive, suppresses weeds, and softens the visual contrast. Refresh mulch annually as it decomposes.
Curves require more prep time than straight runs. Use a garden hose laid on the ground to visualize the path’s shape. Adjust until the curve feels natural, then mark edges with landscape spray paint before excavating.
Budget-Friendly DIY Stepping Stone Patio Projects
Poured DIY concrete stepping stones cut material costs to under $1 per stone. A standard 60-pound bag of concrete mix yields roughly 0.45 cubic feet, enough for three to four 12-inch round stones at 2 inches thick.
Materials and tools:
- Concrete mix (no gravel aggregate for smoother finish)
- Disposable plastic molds, old cake pans, or build wooden forms from scrap 1×4 lumber
- Vegetable oil or commercial mold release spray
- Mixing tub and hoe, or rent a portable cement mixer for batches over five stones
- Work gloves and safety glasses (concrete is caustic)
Steps:
- Coat molds with release agent.
- Mix concrete to a thick oatmeal consistency. Too wet and stones crack: too dry and they won’t consolidate.
- Pour into molds, tap sides to release air bubbles, smooth top with a trowel.
- Embed decorative elements, glass gems, ceramic tile fragments, leaves for impressions, within 30 minutes of pouring.
- Cover with plastic sheeting and let cure 72 hours before demolding. Mist daily to prevent surface cracking.
- Cure an additional week before placing in the ground under foot traffic.
Salvaged materials offer another budget route. Craigslist, Facebook Marketplace, and Habitat for Humanity ReStores often list free or cheap pavers, bricks, and stone from teardowns. Mismatched pieces create an eclectic, collected-over-time look that suits creative home landscaping projects.
Brick pavers, 4×8 inches, are inexpensive when purchased by the pallet from big-box landscape suppliers. Lay them flat or on edge for varied heights and textures.
Choosing the Right Materials for Your Stepping Stone Patio
Material selection hinges on climate, traffic, and aesthetic goals.
Natural stone options:
- Bluestone: Dense, slip-resistant when textured. Handles freeze-thaw without flaking. Colors range from blue-gray to rusty brown. $8 to $15 per square foot.
- Sandstone: Softer, warmer tones (buff, tan, red). Absorbs water, so seal in wet climates to prevent spalling. $6 to $12 per square foot.
- Limestone: Pale gray to cream. Develops patina over time. Scratches more easily than bluestone but repairs with light sanding. $7 to $14 per square foot.
- Granite: Extremely hard, resists staining. Polished surfaces get slippery when wet: specify thermal (flamed) finish for traction. $10 to $20 per square foot.
Manufactured alternatives:
- Concrete pavers: Consistent sizing, widely available, budget-friendly. Textured surfaces mimic stone. Can fade in direct sun without integral pigment. $1 to $3 per square foot.
- Porcelain pavers: Non-porous, frost-proof, available in wood-look and stone-look finishes. Lightweight but expensive. $8 to $18 per square foot.
Thickness matters. Stones under 1.5 inches crack under heavy foot traffic or freeze-thaw. Aim for 1.5 to 2 inches for residential patios.
Surface texture affects safety. Smooth stone looks sleek but turns into an ice rink when wet. Specify thermal, cleft, or brushed finishes for exterior use. Homeowners in freeze zones should prioritize slip resistance as outlined in various outdoor living guides.
Local availability reduces cost. Stone quarried regionally ships cheaper than imports. Ask landscape supply yards what’s native, it often suits the regional aesthetic better anyway.
Conclusion
Stepping stone patios deliver flexibility, visual interest, and straightforward installation without the commitment of mortared hardscape. Whether using classic flagstone, poured DIY rounds, or geometric concrete pavers, the key is thoughtful layout, proper leveling, and materials matched to climate and foot traffic. With basic tools and a weekend, most homeowners can transform a muddy path or bland lawn into a functional, attractive outdoor feature.